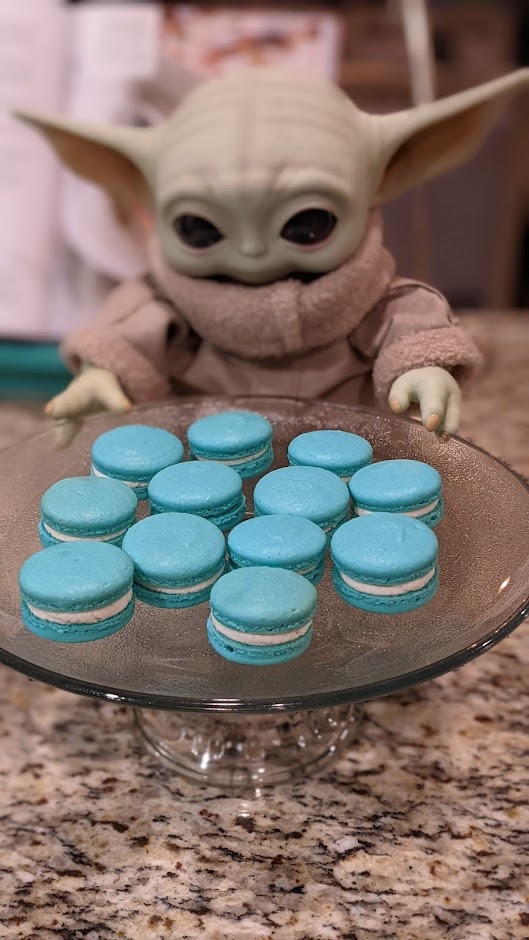
Grogu's Half-Batch Macarons
I love making macarons, but many of the recipes I've used make a lot of macaron shells. Sometimes I just want to make a few macarons as a treat. This recipe makes exactly one baking sheet's worth of macaron shells, or 15 assembled cookies.
Updated 12/30/21 with a five-minute post-bake and 10 minute chill to get perfect macarons every time!
Ingredients
- 80g almond flour
- 85g confectioners' sugar
- 60g egg whites, room temperature (2 eggs)
- 1/8 tsp cream of tartar
- 1/8 tsp salt
- 50g granulated sugar
- 1/4 tsp vanilla extract
- Food coloring. For Grogu's cookies I've used Wilton's Icing Colors in Teal.
Vanilla Filling
- 2 tbsp butter, room temperature
- 24g (2 tbsp) Crisco or other vegetable shortening
- 150g confectioners' sugar
- 1/4 tsp vanilla extract
- 1-2 tbsp milk
First, sift together the almond flour and confectioner's sugar into a large bowl. I like to put the bowl on my kitchen scale with a mesh strainer on top, tare the scale, then add the almond flour and sugar to the strainer in the correct amounts. Then I take a spatula and stir the mixture around the strainer until it's all sifted through.
Set the bowl of dry ingredients aside and prepare a stand mixer with a whisk attachment. Add egg whites to the bowl of the stand mixer. Beat the egg whites on medium until they get a little bit foamy. Add cream of tartar and salt and return the mixer to a medium setting.
As the mixer is running, spoon a bit of the granulated sugar in at a time. If you add it all at once, it could deflate the eggs. Once all the sugar is added, increase the mixer to high speed until the eggs reach a marshmallowy soft peak stage. Add in the vanilla extract and the food coloring. Return the mixer to high speed and beat until stiff peaks form.
Remove the bowl from the mixer and add half of the dry mixture to the egg whites. Fold in the dry ingredients with a spatula until they're incorporated. Then, add the other half of the dry mixture. Continue to combine the mixture by scooping up from the bottom of the bowl and folding the ingredients over themselves. Turn the bowl as you scoop to ensure that everything is equally mixed.
The batter will begin to thin out as it's mixed. Eventually, it will get to a point where it's still somewhat thick, but flows smoothly from the spatula like "molten lava". At this point, add the batter to a pastry bag with a large tip. The first few times I made macarons I used the largest round pastry tip that came with a standard cake decorating set and it worked just fine. I ended up getting a very large tip meant for making macarons and it does make piping a bit easier, but really, if you don't have a giant icing tip you can make do with what you have.
I use silpat sheets with pre-marked circles for macarons on my baking sheets. They're great for getting uniform cookies, but I used to have problems with the bottoms of my macarons not coming cleanly off the silpat. However, I've come up with a way to fully solidify the bottoms of the cookies, which you'll see in the baking instructions below. If you don't have a silpat sheet, you should at least use parchment paper or silpat under your macarons, don't pipe them directly on the baking sheets! And don't use wax paper if you don't have parchment paper!
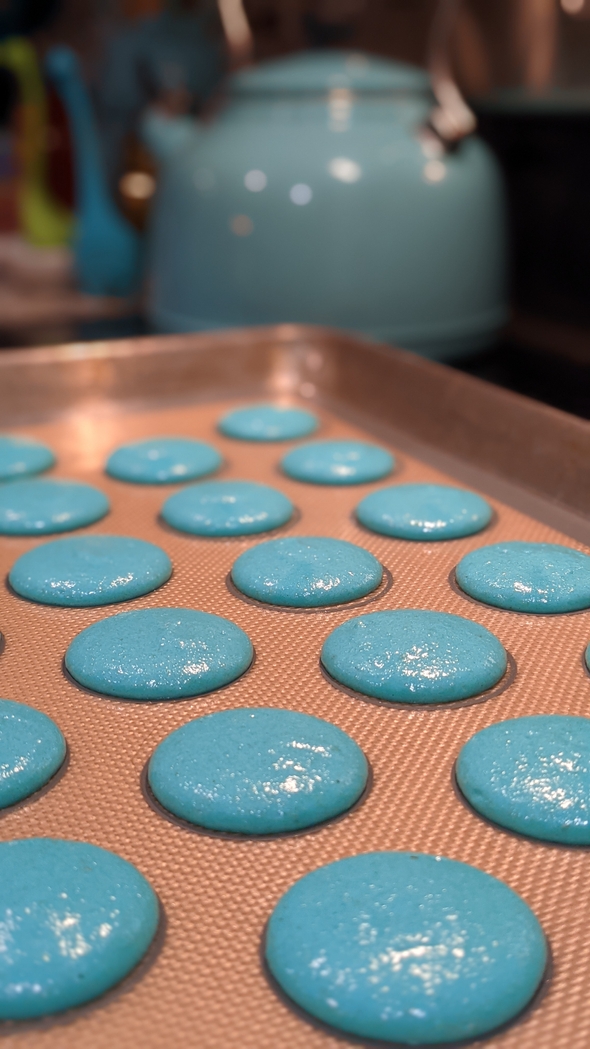
Whatever you decide to bake your cookies on (not wax paper), you should pipe the batter in even circles. I basically hold the piping bag in the middle of the circle straight down, squeeze, and give the bag a little swoosh after releasing the pressure, to cleanly break contact with the surface of the cookie. The batter will spread out a little bit after piping. Once all the cookies are done, I lift the baking sheet off the countertop a few inches and drop it a few times to eliminate air bubbles. I probably do this more aggressively than I need to, but I also like the stress relief.
I live in a climate that is humid almost all of the time, so I usually let the macarons sit out for at least an hour to dry. If you live in the desert you could probably get away with a shorter drying time, but really, it won't hurt anything for them to dry for longer. The real problems happen when they don't dry long enough. You know when they're dry when they go from glossy to matte, and when you touch them they feel, well, dry.
Pre-heat the oven to 300 degrees Fahrenheit. Please do not use a convection oven setting.
... I need to repeat this for my future self. Do not use the convection oven setting
Seriously, I am always trying to use the convection setting for macarons and they always turn out terrible, but when I use the regular bake setting they generally come out alright. Once the oven is preheated, bake the macarons for 15 minutes. They should have popped up with a lacy little foot underneath. Now, turn the oven off, open the oven, and turn the baking sheet 180 degrees. Close the oven, and let the macarons sit in the oven for an additional five minutes. This will allow the bottoms of the macarons to harden completely. After the five minutes is up, remove the baking sheet from the oven and allow the macarons to cool undisturbed.
My second new trick for making sure that the macarons harden completely is to cool the cookies on the baking sheet for about half an hour, long enough that the baking sheet is completely cool to the touch. Then, I put the entire tray in the freezer for about 10 or 15 minutes. This chills the macarons so they can be easily peeled off of the silpat without leaving any residue behind.
Once they're completely cold, carefully peel the shells off of the baking sheet/parchment paper. At this point, you can store the shells unfrosted in the fridge or freezer if you're making them ahead of time, or go ahead and pipe some frosting in between if you're going to eat them soon. I like to add the filling the night before I'm going to eat or serve them and let them age a bit in the fridge, but that can also backfire if you're using a very liquid filling. Once I made a quick strawberry jam as a filling and it made the macarons very soggy by the next day.
I often used canned frosting for my macarons because I haven't yet found the perfect frosting recipe, but this has been my most successful attempt yet:
For the filling, combine the butter, shortening, and vanilla in a stand mixer with a whisk attachment until creamy. Add the confectioner's sugar a bit at a time, mixing slowly between additions. This is mostly to keep your kitchen from becoming covered in sugar. Once the sugar is in, add a tablespoon of milk and beat the icing on a medium-high setting. I like to make sure it's well-whipped and fluffy. If the frosting is too stiff, add more milk.
I've found that the butter and shortening mixture keeps the icing at a softer consistency in the fridge than full buttercream, but it doesn't taste quite as good.

